Monday, March 12, 2012

In Progress Building Projects

In Progress:
This past week my pal M and I went treasure shopping at Extra (Denver CO, Extrabuild.com). We made a haul. I was tempted to keep the place a secret but in exchange for digital before and afters we negotiated a bit of savings. Secret vs Savings... I saved me some money and this is the plan. Plus if anyone goes and loves it like I did I can feel good about spreading the positive building mojo.

The before(s):

Project Kitchen Island
I spent $125.00 on a cabinet base and two panels with full size door/accents mounted on them.  The remainder of what was a island in a design showroom had been purchased by someone else but no problem because my space is small and this is perfect.


The Design Plan:

Bad photo shop mockup:)


  • I want to add a new 19 inch cabinet for the trash pull out. Luckily the large panel door thingies are the perfect size to attach to a trash pull out and look so perfect I must squeal. I love the idea of creating an island that is so affordable with such fine materials.  
  • Bead board all around the outside (ties into the Red cabinet redo from the rest of the kitchen)
  • Butcher block counter top.
  • Some finishing elements and done.
 It will look so awesome contrasted with my red cabinets. So I will keep posting wins and fails for this project. Also as much as I hate to share my new favorite source Extra is a girls dream.

Guest bedroom Headboard:
Found a cool door at Extra.  It screamed make me headboard and paint my little squares with chalkboard paint so we can leave our guests fun messages before they arrive.

The door is a simple one and the size perfect to cut down for the guest room full size bed.


The Plan:
Frame it in 2x6 and 2x4
Prime and paint the piece white
Fill insets with black chalkboard paint
Bad photoshop mockup:)

My hubby has the framing and nailing, screwing, etc done. I just need to take some pics and get oneot the  paint.More to come....

Jen


Tuesday, February 21, 2012

DIY Secret Jewlery Organizer (slides behind vanity mirror in bedroom)


Success! 

I feel wonderfully clever today. I created a Jewelry board that glides out from behind my bedroom mirror. Yep James Bond has nothing on me... I have a secret necklace organizer.
I have to admit that jewelry might be taking over my bedroom.  It doesn’t help that I keep on creating new pieces.  So organize and minimize impact is needed.

The mess:


How did I do it?

Supplies:
·         Red cabinet door (I created as a sample for the Kitchen refinish project)
·         Scrap of canvas
·         Piping (white I stained with coffee to look like soft rope)
·         Scrap of poly batting
·         Bits of cardboard
·         Staple gun
·         Glue gun
·         White hook Sets (painted beige with kryon)
·         Gold heavy gage jewelry wire
·         cabinet drawer glides (Lowes $15.00)
·         crayon

Building the board
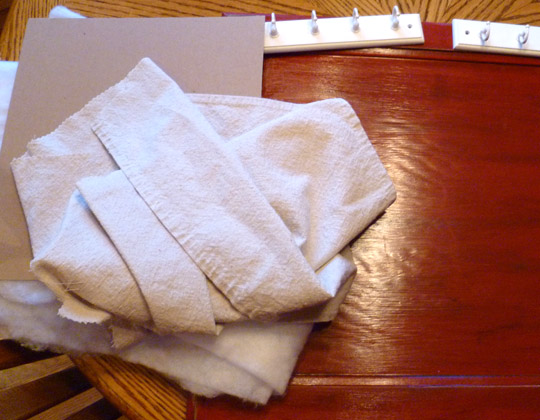
1    Simple construction and this can be done with any combination of supplies that make sense for your needs.  I used the cardboard, canvas, batting and staple gun to fold and secure a canvas batted insert to the cabinet door.
  1.  I carefully stapled the inset into place along the edge.  To be hidden in a later step.
  2. Using the gold wire and the staples I created 3 rows.  I stapled the end down and then twisted it to secure. Repeat on all sides.  Again, this is all hidden in a later step.
  3. I was determined to use supplies on hand so instead of purchasing rope when I realized I had none I instead used a length of piping (cotton and so soft) and stained it in coffee. It smells sooo good!
  4. With a bead of hot glue I ran a continuous border to the batted inset. This worked to hide the staples and twists on the wire.  When I was finished I wrapped it in a flower(ish) swirl to hide where the two ends joined. I also figured I could fasten broaches and things into the soft cotton if needed someday.

At this point I mounted the board to the wall because I didn’t want the hooks to get in the way as we fastened the glides to the back.
Hanging the board
  1. While the dresser was in place I drew a line in crayon for the border of the mirror.
  2. Using the furniture slides my dad gave me for Christmas we slid the dresser (nice time to vacuum)
  3. Finding the Stud and holding the glides up we marked where the glides would be mounted
  4. Mounted the glides to the back of the jewelry board.  Careful to mount correctly for the direction of the slid. My husband actually did this partJ thanks for the great help honey.
  5. Holding the board with glides fully extended we mounted the board to the wall. Just like a drawer we used a glide at the top and the bottom. This was a really quick effort because the husband came ready with all necessary tools. Level, drill, bits, extra screws, etc.

Final Touches
Depending on the needs of your board it may not be necessary to apply the hook boards. I have a ton of heavy stuff that I plan to pile on it. After all no one will see it!
  1. I attached the hooks
  2. loaded the board with baubles.

I slid the dresser in place and done!   No more dumping stuff all over the dresser to find a piece. 

Monday, February 6, 2012

Leather Flowers Part 2

Leather Flowers Part 2:


The next morning the flower petals I sculpted on the spoons looked AWESOME! They have a subtle shape very similar to real flower petals. the creases I created in the bottom of the petal stayed perfectly and required no sewing.

Step 1: Cut out a inch circle of leather.


Step 2:  Carefully glue (I used high heat glue gun) the petals to the circle in the outside layer.

Step 3: Glue center embellishment down. For this I used a clear craft glue (e6000).  While shopping for sparkly center pieces I was bit surprised at price. Buttons with good glass crystal centers are $10 - 15  a piece. Even with a coupon it was more than I wanted to spend. I didn't find anything vintage and nice looking for inexpensive. It stalled the project a bit. But then I was in Joanne fabric and looking in the clearance and found some bridal stuff for .75 cents. Awesome.   

Step 4: Glue a pin backing on the back. I used e6000 again. 

Rant: I hate the coupons and craft store markup. I can't stand to buy things full price and only one coupon per checkout always has me giving up and buying stuff at full price. Which I am sure is part of the design. I am soooo tired of it. I plan to buy stuff at Denver Fabric more often. Better pricing and less fuss. Cut your own is also brilliant. I don't have to wait for the number I got to be called and the unfriendly staff at Hobby Lobby or Joanne fabric to finally cut my bolt.

Wednesday, January 25, 2012

Leather Flowers Part 1


Making Leather Flowers Part 1:
Inspiration:

Cake Flower… Beautiful

Tools:
Scissors (Sharp), Leather, Pot and pan, picture of flower with good detail for petal cutout.

Step 1: Cut out the flower petals. I literally blew up the pic and cut the petals out for both rows.

Step 2: drop into a pan of almost boiling water and let all the leather soak up the water.

Step 3: I used spoons and molded the now pliable and wet petals into a petal like shape. I used really big spoons. The flower petal size will dictate. But any concave surface will work.

Step 4: leave to dry overnight in the spoons.

Notes: I kinda squeezed the water out a bit before molding the petals on the spoon.  I made each petal al little different so they will stack and look individual. I wish I had white leather. No luck finding it at the store either.

End Part 1

Wednesday, January 18, 2012

DIY Leather OBI belt


PURPLE and bedazzled Obi belt


I love purple, bling, and now obi belts.  Turns out belts are a little bit personal in terms of size (length), width (long torso short torso), etc.  But I really wanted a pattern and steps to create a purple leather obi belt.  At the stock show in Denver I picked up leather scraps for $5.00. Big ones!!  Purple and black. 

After a lot of searching and reading I decided to create my own pattern get brave and just do it.  My pattern is specifically arranged so my belt would leverage the scraps more effectively.
I found 2 sites that after reading I felt confident enough to proceed: http://catonalimb.blogspot.com/2011/11/suede-flower-leather-obi-belt-tutorial.html

What you need:
1.       Leather sewing machine needles
These were critical and apparently have a slight cutting edge to help the needle smoothly puncture the leather. My leather is pretty thick so these were great. I only broke 1!I will elaborate in the steps.
2.       Rotary cutting blade or sturdy scissors that will not bind
3.       Coordinating or contrasting thread
4.       Leather


Pattern Notes:
·         I ended up making the end pieces rounded because they seem to fold more perfectly to join the strap.  When I played with a pointed or straighter end design the junction to strap looked off.
·         Where the pieces are seamed together it was way too thick for my machine to sew across for the overall edging. I stopped the edges before each  join and resumed on the other side.  I used super glue

My flower is a bracelet like add on. It slides off or on and is not fixed to the belt.


Look # 1 Just the bracelet like strap and the tied ends intersecting the long wrap pieces
1.       Create a 1 x 10 strip of material
2.       Punch 2 holes in loop
3.       Run leather strap/scrap through holes.
Look #2 Bracelet hidden by big flower and pin 
1.       Create flower petals in leather or fabric
2.       Sew into shape
3.       Sew onto round scrap of material in any configuration
4.       Punch 2 holed in center and run scrap/strap from look 1 into holes for 2
5.       Add a pin of any kind or glue on button or embellishment to hide messy sewing. Unless you are good like the inspiration and your stuff looks clean. Mine didn’t
Look # 3 Plain beltJ

Monday, January 9, 2012

DIY Gift Lemonade Stand in a Box

Lemonade Stand in a Box Gift

FYI: Was intended to be a Christmas gift to the neighbors.  It was only 2 weeks late:)


Step 1: print the labels and tally sheet.  I created a them in power point and printed them on avery 8/12 x 11 adhesive sheet and white cardstock. Free printable if you want my design.  I laminated my tally sheet so the gift recipient can use a dry erase pen over and over again.  I created the list of instructions and best practices from the country time website and kids business ideas I looked up.

Step 2: buy a few supplies! Use your imagination and make this gift as large or small as you like. I considered a plastic pitcher from the dollar store and putting all the supplies inside the pitcher. I ended up loving a cute green swirl pattern shoe box from Target a bit more and like the idea the kit fit on a shelf and was all in one box.
What I bought for the box:
ü  Lemonade mix    I purchased a jar of lemonade mix from the grocery store when on sale and with a coupon.  So the big container of mix only cost a couple of dollars. 
ü  Mini citrus colored whisk   I got a 2 pack at big lots for $4. The full size did not fit in my box.
ü  Plastic locking lid shoe box Target carries a couple of storage container styles with every size imaginable available in a set pattern.  This green box feels summer citrus to me. I like that it is clear so the fun contents can be seen inside.
ü  (2)  20 pack green cups The dollar store had the perfect color of green and 2 packages fit perfect in the box with the large package of mix.


Step 3: Make the big sign. I specifically used fabric so it could roll up into the box.

a.      I sewed a fabric strip to a vinyl shelf liner. I created 2x1 rectangle of yellow scrap fabric.  It was thin so I doubled it.
b.       I folded the vinyl shelf line (clearance bin from Michaels for .50c a roll) package style over the edges and used my sewing machine to sew it down.
c.        I placed a flower scrapbooking eyelet in each corner so the sign can be hung in any way necessary. In hindsight I should have used big grommets but the flower was so pretty.
d.       I used my silhouette cutter to create the letters LEMONADE STAND in sparkle glitter iron on vinyl. Each letter is a 1.5 inches tall and the glitter will get the drivers attention when the stand is sitting in the sun. Craft stores sell letters of all sizes or a simple stencil would work so vinyl iron on is not a limiting factor.
e.       I used chalkboard paint to make a small price square on the sign. Let the kids pick their price. I included a piece of chalk and vis-a-vie pen in the box for the tally sheet and sign.
Note:  If you have never done iron on letters before I have to mention that regardless of the cutter you must mirror image the letters so they cut out looking backwards. When you place the vinyl on the fabric  for iron on the letter face the right direction. I have wasted a good bit of vinyl forgetting this fact when I rush. 


Thursday, January 5, 2012

DIY Jewelry Organizer


Earring and Bracelet Keeper
Note: I need better pictures when the daylight is available!


Not sure if I should be sad or proud that I have so much jewelry I need a huge armoire and two separate wall mounted organizers.  One constant challenge has been bracelets and earring. In a box or drawer they get jumbled and I have too many to keep them sorted by pair and sitting alone.  Soo… Pintrest to the rescue, after much research and a wander through Lowes this is the outcome.

Supplies:
$6.00 key rack (the pretty unique hooks were removable as they screwed from behind)
$5.00 pre-sized length of copper pipe
$4.00 knobs from hobby lobby
Free frame and shadow box I already owned
Drill
Black stain I already had on hand.


Steps:
1.       Create distressed antique finish by sanding corners of frame and spot around the frame and then sporadically wiping black stain on. Let dry for a couple of days and adjust according to desired result more or less stain and sanding.  I considered a black paint finish but decided against it. Anything works.

2.       For the necklace shadow box I removed the glass and had originally planned to create a new insert. I skipped that and left the glass out and the necklaces exposed. Way too overloaded now so the insert may still be in the futureJ
3.       For the earrings and bracelets I attached 2 of the hooks in the bottom corners of the frame level.  I tested that the rod would easily rest in the hook without problem. I choose copper but a dowel or pvc painted would work as easily.


4.       Using duck tape around the screw of the knob I wrapped it and twirled the knob into the copper for a snug fit.  I did not glue it as I was not sure how my patina on the copper will look if glue is involved. I used vinegar and salt to start the patina so in a few days it should look really cool.
5.       For the earrings I used a black satin background, created 2 ruffles of tulle netting run onto wire.  In this case the glass was not a snug fit (I tested) so I wrapped the glass with the satin and carefully wrapped the wire around the glass and twisted them into knots on the back of the glass.  So the wire will not move and the knots are sandwiched between the glass and the frame back.

a   a.   The top ruffle is the tulle folded in half and the wire threaded along the entire width and scrunched for the ruffle.


b.      The second row is one layer, longer and then tucked into the bottom of the glass to secure the base and make a simple puff of tulle.       I wrapped a second run of wire no tulle but it is not functional so skip that step.
7.       I carefully placed this creation on glass into place. Note if you don’t have glass with a bit of room on either side the wire and wrapping will be too much and the glass will shatter when you put it into the fame.