Thursday, November 17, 2011

Added Stuff for Craft day

Added Stuff for Craft day

Drink Jar Recipes from: http://www.myrecipes.com/recipe/classic-cocoa-10000001011198/


So cute! I will have all the tags precut for ease:)

Ingredients

1 cup granulated sugar

1 cup unsweetened cocoa powder

1 cup powdered milk

1/2 teaspoon salt

1/2 cup miniature chocolate chips

1/2 cup miniature marshmallows

Preparation

Layer sugar, cocoa powder, powdered milk, salt, chocolate chips, and marshmallows.


Ingredients

1 cup powdered milk

1 cup unsweetened cocoa powder

1 cup granulated sugar $

1/2 teaspoon salt $

1/2 cup miniature chocolate chips $

1/2 cup crushed peppermint candy

Preparation

Layer powdered milk, cocoa powder, sugar, salt, chocolate chips, and peppermint candy.

Note: This mix will fill a 1-quart jar (12 servings), but if your containers are different sizes, just keep the ratio of ingredients constant. On the back of the tag, write: "Mix contents in a large bowl. For each serving, place 1/3 cup cocoa mix in a mug and stir in 1 cup boiling water. Store remaining mix in airtight container."

Also I grabbed some cute resin flowers from Pickyourplum.com
I will have a few options if you want to make a few jewelry pieces. .79cents for the flower. SCORE!


Monday, November 14, 2011

DIY Popcorn Gift Set


Popcorn Gift Set
Simple and sweet, salty or savory...

This gift arrangement is based on a small box designed to serve popcorn from. inside the box we can add:
  • microwave popcorn bag
  • custom seasoning
  • DVD
  • Movie Gift Card
  • Jump Drive with home videos

The idea occurred to me when I purchased an expensive sea salt and vinegar popcorn flavor seasoning at the store.

Seasoning Recipes:


Salt and Lime
1/2 cup salt
4 - 6 packets true lime


Chocolate Lovers
1 tablespoon cocoa powder
1/2 cup powdered sugar

Cheddar Bacon
1/2 cup Powdered Cheddar Flavor
1 Tablespoon Bacon flavor

White Cheddar
1/2 cup Powdered White Cheddar flavor

Ranch
2 tablespoons White Cheddar Flavor
3 tablespoons Powedered Ranch Dressing Mix


Waffle Iron Possibilities


The waffle Iron (My best weapon)
I can’t help but notice all the waffle iron like products available now.  You can get one for cupcakes or donuts, or convert to Panini.  All told it would be a lot of money and storage space to house the many varieties. But the display in Macy’s got me thinking, and then googling and the ideas started flowing.

Idea number 1:
Splendid! Cake mix and simple scream “Try this Jenny”. So I did. It was awesome and I told my friends on facebook.

Idea number 2:
Then I got to thinkin… Yep it hurt! Muffin mix is a lot like cake mix and dirt cheap. So I tried strawberry and it worked so well I told my friends on facebook. My friends K & M (yep initials, for the record this how we refer to each other in text messages) hit the idea and made a number of flavors. It is tested and certified for success.

Idea number 3:
Yesterday I got a text from my bud H and her hubby and boys took it to the next level.  Imagine a drum roll because this deserves it.   Grands Cinnamon Rolls in the can. Genius, Brilliant, wonderful.  Her boys added syrup or glaze to the finished masterpiece and they looked so delicious.

I will update this Waffle  Iron idea list with all tested and wonderful creations.

Thursday, November 10, 2011

Burnout shirt mishap and refashion to the rescue


Burnout shirt mishap and refashion to the rescue

I created a bunch of burnout shirts for a local gymnastics team support crew. I ordered Bella Burnout shirts and applied a rhinestone design (I created with the Silhouette) and some iron on logo stencils.
How the mishaps? Before I got my act together I tried to use Martha Stewart everything paints instead of the glitter vinyl stencil.  That did not work. In fact I used her silver foil, glitter transfer sheets and adhesive as well and none worked for me.

Long story short a few shirts had problems.  Enter the refashion.

  1. I used the reverse applique technique detailed at Sweet Verbena.   
  2. Mostly gone errors:)
  3. Simple oval to remove stuck together paint from the right top of the shirt.  
  4. I clipped the hem off a bad shirt and applied a 2 layer ruffle and added flowers made from the standard stacked circles and cross sewing on the machine. Using some circles cut from the rhinestone letters incorporates my pink color scheme I am using on the sugar skull. Bingo no more ugly mess.    
  5. I found a beautiful sugar skull image online at some point. I wish I could credit the designer but I clipped it for a tattoo idea and didn’t capture the artist name.  I loaded it in my silhouette cut line tool and went about meticulously creating an iron-on and weeding out the relief.  
  6. Bad photo I will try again with some help
  7.   Ironed onto the bottom side and my refashion took 30 minutes and now I have a fun shirt.

Tuesday, October 25, 2011

Christmas Craft Day Lineup

I am having a Christmas Craft Day. I have planned out a bunch of gift ideas and invited all my friends.  The goal is quickly and inexpensively while having fun make lots of gifts affordable and quick. Each of these ideas are based on things I have seen or have patterns for. I made printable labels, tally cards, and signs to make it easy.  The SilhouetteSD will be working overtime for this day.

Pick your gifts or propose new ones and then…
  1. I will purchase, organize and prepare everything for that gift assembly on gift day.  I assume everyone will help each other with each series of gifts if people need a hand. On Christmas craft day **BAM** it is all ready and the group will bust out the presents they wanted in no time flat. 
  2. Let’s leverage our coupons and sales.  If we can agree on supplies and fabric etc. we can buy it with the best bang for our buck. I may enlist some help hitting the stores:)
  3. Propose changes or offer other gift ideas.  These are just mine, what did you need/want to make this year?
  4. Set the date. I propose 2:00pm till done on November 26th (I am guessing about 4 hours).
5.       Bring a laundry basket or 2 on craft day to house and carry this serious haul.
6.  Invite anyone else you want. If it gets big I can arrange to use our church. Otherwise I will host it at my house in Littleton.  I will provide lots of snacks and drinks to keep our energy up.

I created some tags, cards, labels etc. You can use them or create new ones. A link to the pdf I made for each is in the boxes below.

Gift Idea Line-Up
Note Click on the title to advance to the proposed supplies and cost breakdowns.


in-a-box

Click to link to gift idea contents and supplies. Total cost of gift $7.00 (depending on how many ingredients).

Lemonade Stand box kit for kids:
Idea is to package them in a clear top bakery box with ribbon and label. Click here to download the .pdf with labels, tally sheet, strategies, sign, etc.
Ice tray $1.99
Wash cloth $ .39


Whisk $.99
Lemonade stand sign:
On plastic vinyl with black letters 17x12. Rolled up with a yellow ribbon.
Drink Mix any brand
Cups (25) 6 oz. size


Labels, lemon images, etc. Copyright of Mixedupcraftingblog
Cookie Jars
(I will have labels and fabric unless you want a special idea)
M&M Christmas
Gingerbread
Sugar

Hot drinks
The list goes on
$3.50 each unless I get a good deal on jars:)


FYI: gingerbread Jar recipe we can add a cookie cutter
Note from my bud Stacey for Jar success:
Lessons learned about cookie jar craft...
A funnel helps a lot, also when making jars having a cake pan catch all the crumbs makes for easy & fast clean up.
Christmas Card Holder
$5.99 at Ikea and $1.50 for sign
filled with hand-made thank you cards. The sign for above is optional it can fit with the thank you card design we use.
Merry Sign
NOEL sign 


Cabinet Measuring Spoons
Ikea and the dollar store have supplies.  $5.00
I plan to make a set for myselfJ


Cinch and Ruffle Cinch bags
$3.00
Inspired by: LittleBirdieSecretsblog  as a copy of a ThirtyOne bag.


Note: I will cut any iron on design desired with my silhouette so don’t assume it has to be ruffled or with a skull. These are just the designs I am doing.

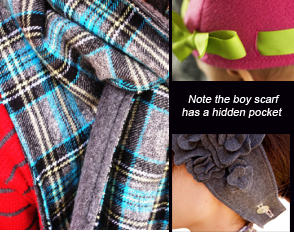
Hats, Scarf, and Ear-Warmers
scarf $2.00, earwarmer $2.00 Flannel and felt are very inexpensive and I will also use a coupon.
Inspired by a bunch of places: momtastic.com, instructables.com, prudentbaby.com, fleecefun.com


Note: The options are endless for this series I will have templates, ideas, etc. printed for this station so you can go crazy or stick to a plan. If you want special designs cut for iron on get them to me in time to have) 
Leather and Pearl Jewelry
Inspired by: LoveMaegan.com
Real freshwater pearls and leather and supplies $2.00  with real bleached fresh water pearls and leather cord. I created a sample to be sure it all worked nicely.
Card to attach for gift giving 


Based on the steps Maegan outlined this is very fast and super beautiful. I made some cards to hang them on for gift giving


Tuesday, September 27, 2011

Monster High Costumes

Monster High Costumes
Inspiration: Frankenstein’s Daughter


Shirt:
Simple T-shirts from craft store for $2.50 on sale.  They were boxy so I shaped them and added a sleve detail that saves me from creating alternative sleeves with poof.
Series 1: Inside the t-shirt sleeve I made a tiny slit halfway from the bottom on both sides. Using a small piece of elastic I ran it through the top with a safety pin and stitched it down.


Series 2: Turned the t-shirt inside out and had Mak put it on.  I pinned the sides to a fitted shape and had her take it off. I stitched along that line for a fitted shirt. As the bustier (faux) is going over top this shirt it needs to fit smooth on the body.  I am surprised how cute the shirt looks.  FYI only the top half of the t is sleeve is gathered because Mak has a broken arm and the cast has to fit through it. I will say this works for a restyle as well because it poufs but isn’t squeezing her bicep which looks lame and is common to a lot a shirts lately from the stores.
Series 3: I cut a square of plaid, lined up like a bustier and sewed it directly to the front of the shirt.  Add a collar like the threadbanger design here http://youtu.be/QkntSQ-s7G4 and almost done.
I forgot to take an after shot when sewn on. Sooo... imagine it sewn on with 2 faux boning channels to the side of each breast.

Using the plaid fabric I cut 2 pieces about 30x10 and 2 pieces cut 60x15. I only ended up using one of the second for the skirt.
Series 1: In the smaller 2 I created a channel to run the elastic. Once elastic was threaded I closed it up and fit it Mak.  Note:  The skirt I copied had the elastic sewn in horizontally but I didn’t want to take that much time. I just sewed it in place on both sides.  I don’t have the girls with me while sewing every step so I keep doing things that allow me to fit to them later.  Not great for steps but works for speed once I get the girls in front of me.


Series 2:  I ran a straight long stich along the top of the long piece. If you skip locking the stitch in you can pull the thread when done and get a gather. Lots of websites describe gathering techniques.  This is crazy fast and easy for a costume.

Series 3: I lined it up and pinned the gathered bottom to the top.  I had to undo and redo this twice to get inside outside correct. I was not thinking it out and trying to work too fast.

All told even with the 2 repeat pinning efforts the skirt only took about 20 minutes to make. And the total fabric purchase was $4 for both costumes. Cheap all together for this effort. I purposely made this a bit modest.  When we add the tulle skirt beneath I want the skirt to stay down and not look like the less modest purchased version.  After all this is for a 9 and 4 year old not meJ

Still to do: temporaty tattoos, latex neck bolts, earrings, tie, belt, dog, journal.

Halloween Decorating

Halloween Decorating
My 6 year old son insisted we decorate for Halloween.  The bad news… I just don’t have many decorations.  So we improvised.
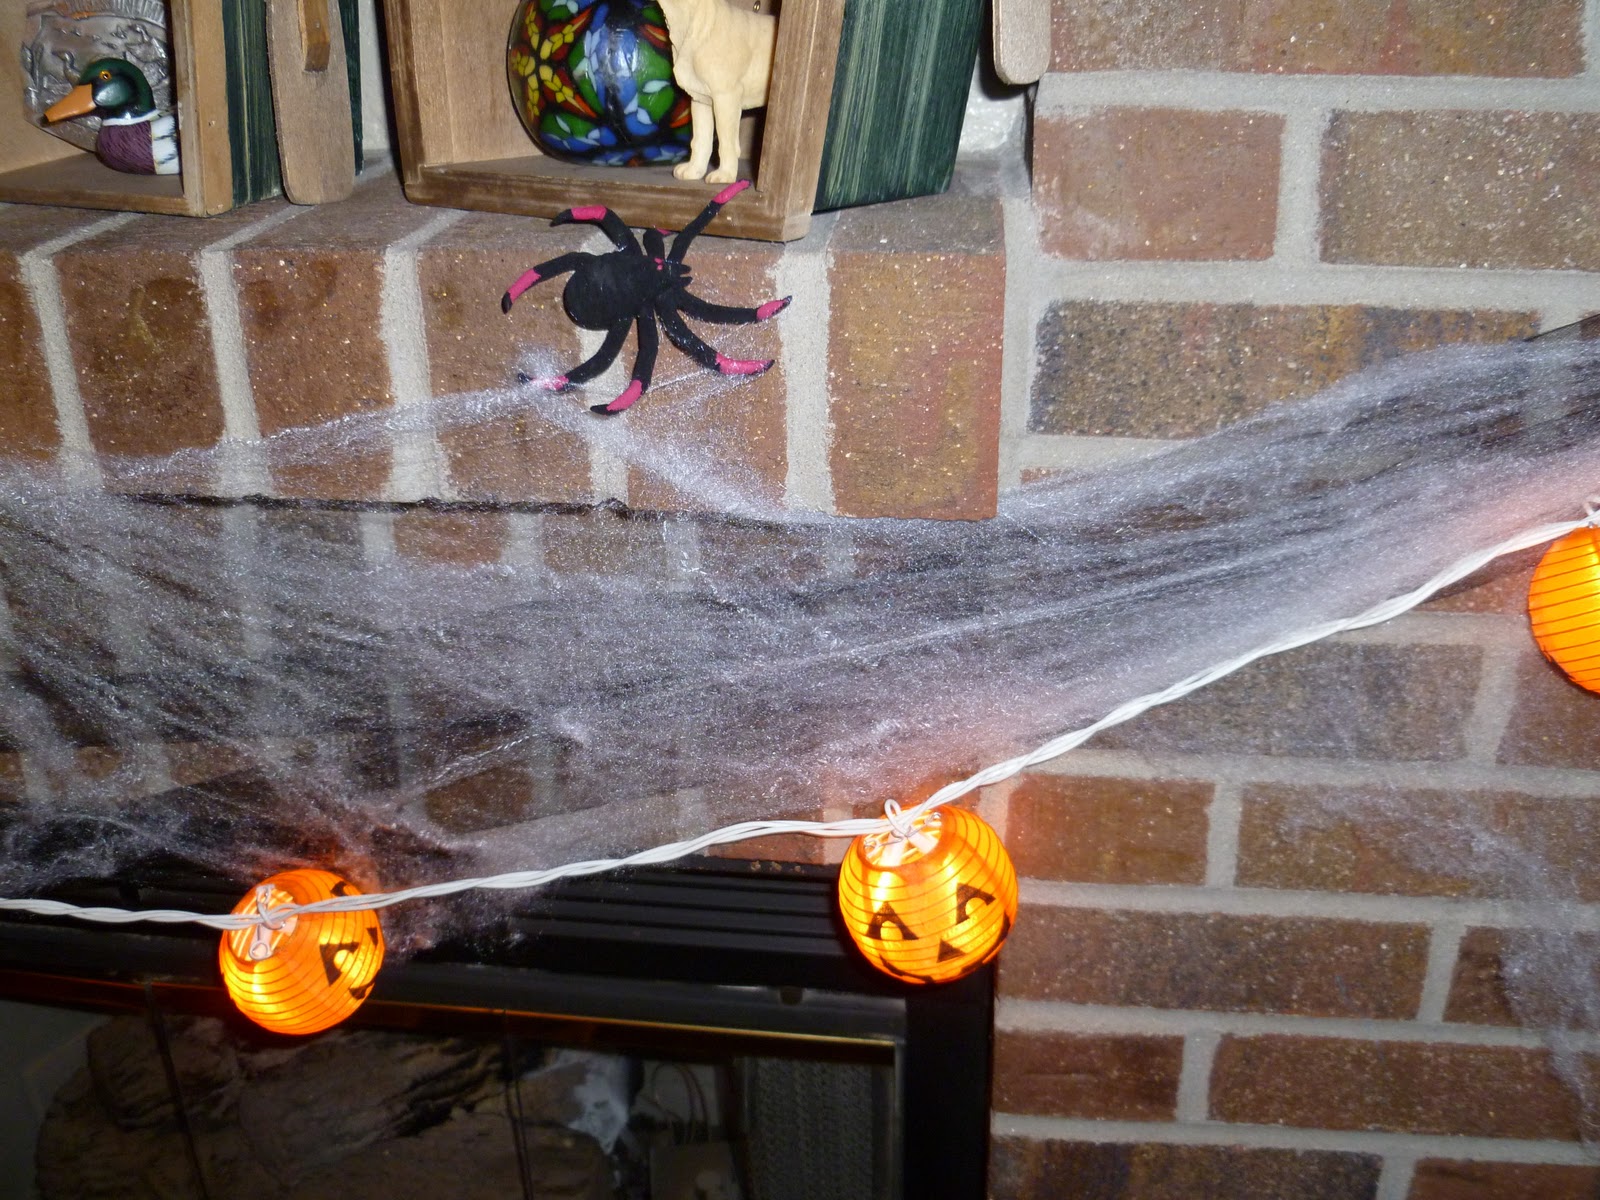
Dining Room Table: I used a scrap of black satin like a table cloth and a scrap of red glitter felt.  I free hand cut out a blood splatter and drops.  My family insists it looks like paint not blood but I disagree.  The candle sticks were mine and I think they look cool with the little spider on top. 

Fireplace Mantle:  This is a motley assortment of things. We started with black tulle draped across the front and added the spider webs for a creepy feeling.  Kaden rigged the spiders and insisted the pumpkin lights go on top.  He loves it so I do toJ